Advertisement
Age and abuse can discolor or rip liners in your boat. But Tom's a fan of figuring out innovative repairs. Here's a trick to cover up any eyesores.
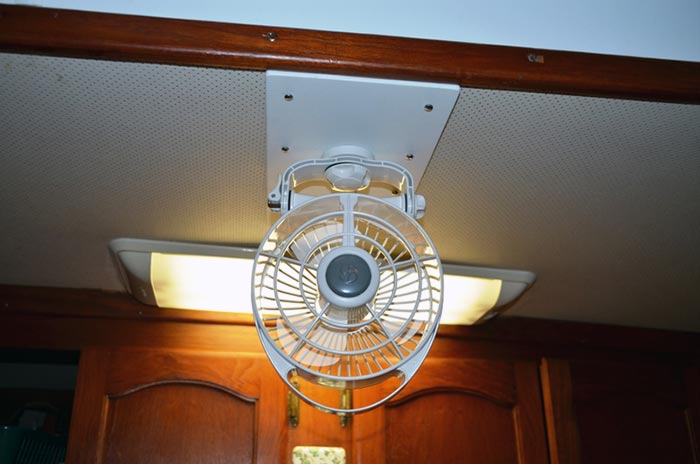
The completed project. Who would ever know what was there?
Liners inside the cabins of boats come in many materials, but they all have one thing in common: Eventually they tear or become damaged. In older boats, even finding the same material may be impossible, and if you do, the job of replacing the entire liner or even a section may be very expensive. Patchwork may be the cheaper and easier way out, but it will probably look like patchwork — and nobody wants that. But if you incorporate another project into the lining repair, you can sometimes disguise the fact that it's patchwork AND get an additional bonus.
For example, on our boat, we had a liner that had been ripped before we owned the boat. Our solution was to cover the problem area with what is essentially patchwork. But you'd never know it because the patchwork has been transformed into a mounting for a new fan.
I purchased a sheet of StarBoard (1/4" x 6" x 12") from West Marine for around $13 (see "Technical Support," below). This material comes in several thicknesses and colors, including white and black. It will take screws (wood or better) and bear weight, depending on thickness and use. It's high-density polyethylene designed to resist saltwater, chemicals, and sunlight. It won't rot or delaminate, and is easily cut, routed, shaped, and drilled, using standard tools. It has a durable surface, which easily cleans.
Technical Support
Degree of Difficulty:
Easy to moderate
Tools:
- Multi-meter
- Wire-crimping tool
- Electric drill and bits
- Butt connectors
- Screwdrivers
- Screws
- Headlamp and shop lights (optional)
Materials & Cost:
- StarBoard $13
- Fan $80
- Butt connectors and six stainless wood screws $5
Project Cost:
$98 (based on West Marine pricing)
Approximate Yard Time/Cost:
This is a straightforward job and shouldn't take a pro more than an hour or so. The national average cost for a marine electronics installer runs about $80 an hour but many have minimums, so you can plan on saving around $100 by doing the work yourself.
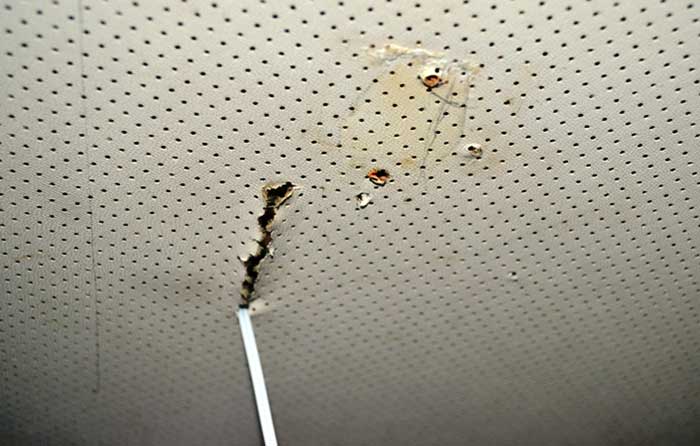
The problem: ripped dirty headliner.
I purchased a sheet just large enough to cover the damage. All I had to do was screw it onto the strip of plywood in the overhead, to which the liner material was attached. I predrilled and used pan head screws. I could have countersunk the screw holes and used oval-head screws, but preferred to not use this slightly weakening process. The material is durable enough that washers weren't needed. When I attached the material, the tear disappeared. But the area, of course, no longer matched the surrounding areas.
We needed a fan in that area, anyway, so I purchased one for around $80 from West Marine. Prior to screwing on the StarBoard, and using the base of the fan as a template, I drilled holes appropriately sized to securely thread the mounting screws that came with the fan and drilled another hole through the StarBoard, behind the fan mount, to take the wire. I taped the fan wire ends to avoid separating the strands and carefully pulled the wires through that hole and pushed them underneath the lining, making sure they were not lying in an area where they would be compressed or where abrasion could occur.
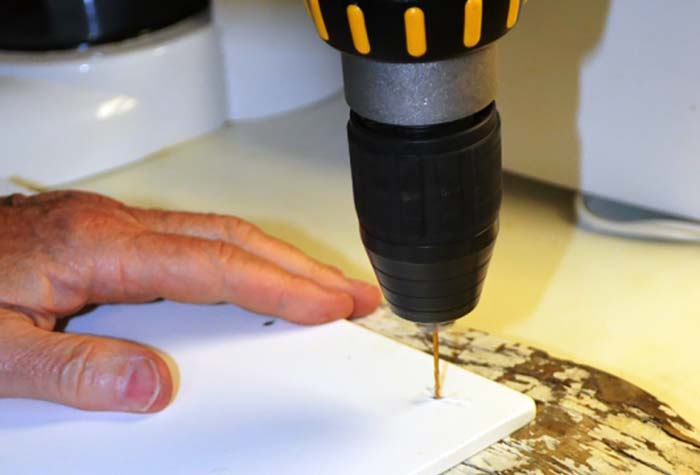
Predrilling StarBoard.
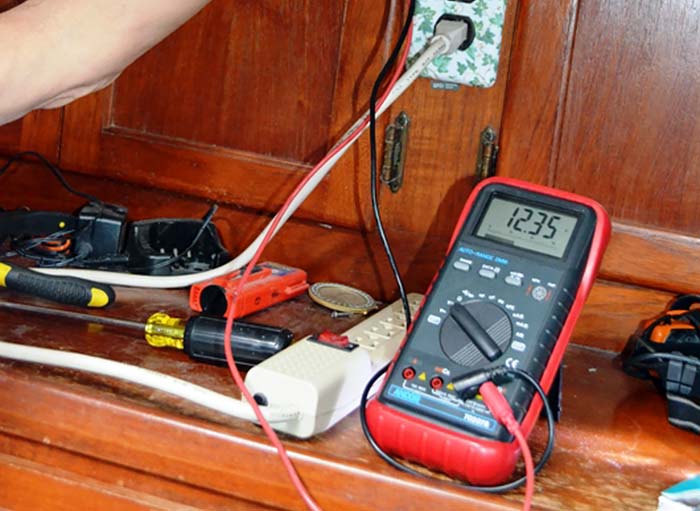
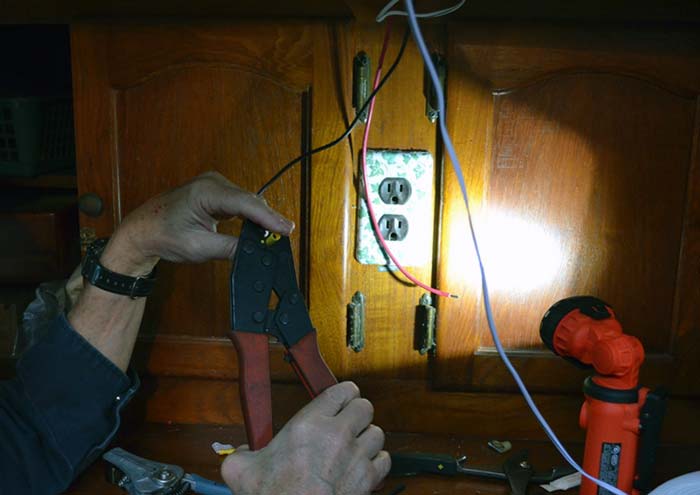
Testing existing wire for polarity and current.
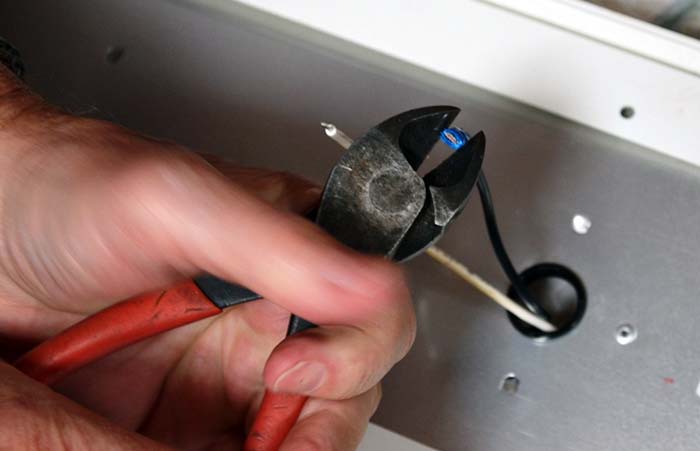
Uncrimping old butt-end connector with careful pressure from dull wire cutter.
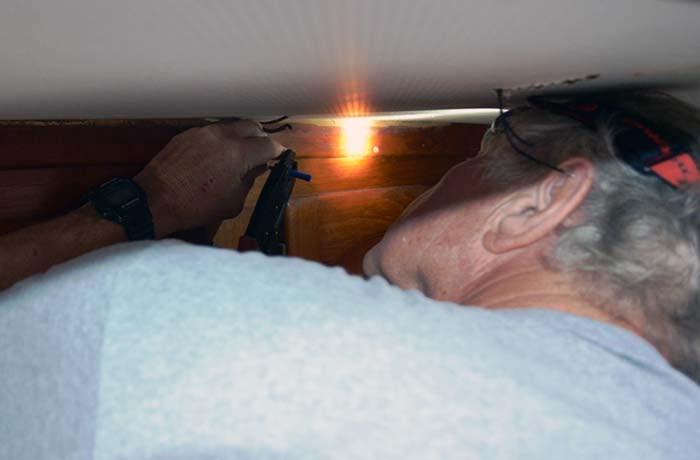
Streamlight 3AA Haz-Lo headlamp lights tight area.
Work light floods dark area. Use quality crimping tools.
With a Volt-Ohm Meter, I tested voltage for the old 12-V DC wiring leading to the area behind the adjacent bulkhead to be sure polarity hadn't been reversed by someone in the ancient past, and then again to be sure power was indeed gone after I flipped the breaker. This wire would've been too short if I cut off the old connectors, so I removed them by carefully compressing them at the point of the crimp with a crimping tool. Next I connected the new fan wires, using tinned butt-end connectors, to that existing wire behind the bulkhead. This work was close to and inside the bulkhead, so I used a Streamlight Knucklehead worklight and a 3AA HAZ-LO headlamp for good lighting. The existing wire was of more than adequate gauge to handle the tiny load of the fan and was already protected by an appropriately sized circuit breaker. The new fan's wires were long enough to allow this work before mounting the fan — a feature I always insist upon when buying something to be installed.
I finished the job by screwing the StarBoard, with fan base attached, to the overhead, attaching the fan and snugly and securing the wire. Now the rip is covered, a smart-looking fan is mounted in its place, and the mounting looks nothing like a jury-rigged repair but a nicely thought-out and properly executed fan mount. Only you and I know it was never originally planned that way!
Plastic Or Wood?
There are several versatile synthetic products now on the market that can be used in place of wood for many boat projects. They're easy to work with, using simple woodworking tools, and easy to hand-sand. Examples include StarBoard by King Plastic, and CMG and KOMATEX by Kommerling. StarBoard and CMG are more robust for mounting purposes. CMG is claimed to also accept fiberglass. Komatex, depending on thickness, can be very flexible and easier to fit, but is less appropriate for structural or mounting purposes.