Advertisement
Do you really need a multimeter? Yes! Once you understand the basics, it can save you time, money, and hassle when trying to locate the source of a power problem.
Your brand-new bilge pump blows a fuse every other trip, and your VHF goes dim whenever you try to transmit. An easy way to find the source of your problem is to get out your multimeter and do some electrical investigation. But first, read the instructions and be sure you understand them. If not, you could hurt yourself and your equipment. Also, you must have a basic understanding of wiring and what is dangerous. This includes the differences between AC and DC electricity and wires on your boat.
Got it? Great! Now, let's review the basics of using a multimeter to measure DC current, resistance, and voltage.
Warning: Many boats have AC power, which can kill. Ensure all AC power is turned off to the boat before starting work. Disconnect or isolate shore-power connections, inverters, and generators. Be certain of your capabilities, and if in any doubt, consult a qualified marine electrician.
Current is the rate of flow of electricity running through the wires in your boat. Think of it like a garden hose, where current is the amount of water coming out. It is measured in amps. When a current is interrupted by something like a bad connection or improperly sized wiring causing a device to stop working, or at least stop working as it should, this is known as resistance — like a kink in the hose. And voltage is, to put it very simply, somewhat similar to the amount of water pressure in the hose. The more pressure, in theory, the more power the current can produce.
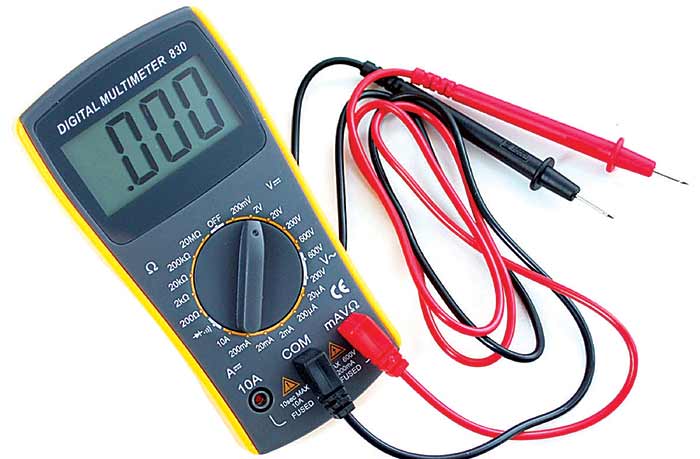
A multimeter can be used to measure all of these things and more. Some units are more complex than others, performing more functions. Some have different features to better measure the same functions (such as auto-ranging vs. manual). Some are digital and some are analog (with a needle). Most of us have simple needs, such as determining basic current, resistance, and voltage, and don't need to spend the extra money for complicated features. However, it's worth spending money for quality, regardless of usage, because electricity can be very dangerous.
Voltage

When you have a problem with onboard electronics, the first thing to check is that you have an adequate source of power available. On a boat, 12-volt DC power is supplied by a battery or batteries, so that's your starting point.
The multimeter I'm using has several capabilities, so because I'm measuring 12 volts, I turn the scale on the meter to read DC volts, and specifically the 20-volt range, which is closest to the voltage that I need to read. (Meters with auto-range may make this adjustment automatically.)
To get an accurate reading, first turn off your battery charger. Then check that the black probe is inserted into the black "common" receptacle on the meter and the red probe is plugged in to the red "voltage" receptacle. Now touch the red probe to the positive (red) battery terminal and the black probe to the negative (black) terminal, and make a note of the voltage. A reading of 12.65 volts or more indicates a full charge, 12.3 volts is a 75 percent charge, 12.2 a 50 percent charge, and 12 volts a 25 percent charge. If the battery reads below 12 volts, it is effectively dead and will need to be recharged or replaced.
Advertisement
Measuring Current
If the problem you're having isn't getting devices to turn on but, rather, keeping them on because of a circuit breaker tripping or a fuse blowing, you might be drawing too much current through a given circuit. Refitting older boats with new, power-hungry devices can exceed the capacity of the original circuits.
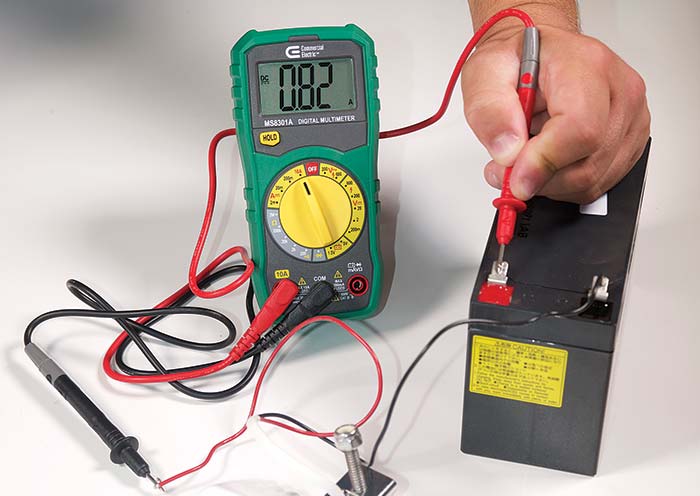
If you don't have good documentation on how many amps a given device draws, here's how to use your multimeter to find out. This test uses the meter itself to complete the circuit. A good place to insert the meter leads is at the circuit protection (fuse block). If there's a fuse, remove it — the meter will be measuring between both sides of the fuse block.
Switch OFF the circuit you're testing, then set your meter's selector switch to DC amps. You'll probably need to move the meter's red probe to the "amp" plug. (Some meters only read a very small amount of amps. See that yours is adequate.)
Disconnect a wire or fuse where you'll measure, and hold the black lead on one side of the fuse holder or wire and the red lead on the other side. Again, take care not to touch the leads together. Finally, switch on the circuit, being careful not to let your body parts complete the circuit. The meter will give you a reading in amps to record. If the total amp draw on a circuit exceeds its protection rating, the breaker will trip. Measure the load of all devices on a given circuit and add together to find out if it's overloaded. If so, you'll need to upgrade the wiring and overcurrent protection.
Continuity Check

For electrical equipment to work, there has to be a complete circuit from the power source to the thing that is being powered and back to the power source. Sometimes, even when everything looks OK, that bulb, fan, or other gizmo just won't work. This could be due to a continuity problem — a break in the circuit. Using your multimeter, you can determine if a bulb has blown or a fuse is bad, or ensure that any other number of components has good electrical connectivity.
To test the circuit, make sure your power is turned off. Start by setting the multimeter to the ohms scale, usually represented by the Greek letter Ω (omega). An ohm is a measurement of resistance. When there is a break in the circuit, your meter will show "OL," which means "overload" or "open loop," i.e., a break in the circuit. When the circuit is complete, the meter will show a very small reading, indicating that all is well. If it registers more than a few ohms, it could indicate a poor connection or a bad wire in the circuit causing unwanted resistance. Address this by carefully checking all circuit components.